It doesn't take long at all to receive your fireplace mantel
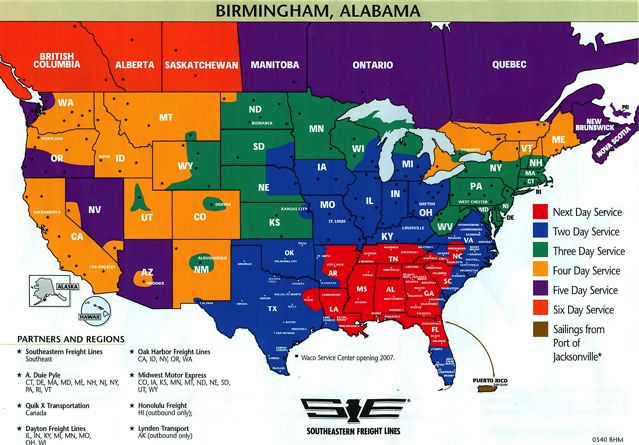
- If you live in the Birmingham or Huntsville (Alabama) areas it usually only takes a few of days after you place an order.
- If you are ordering from out of state it depends on how far the order must be shipped, but it usually takes two weeks or less after your order is placed and the custom dimensions are confirmed. Each mantel has the amount of time it takes to create listed by it in the "Shop Now" section of the website. If you are ordering online and your mantel is being shipped it will be that time plus the transit time listed depending on your location.
The Mantel Shoppe now finishes your mantel however you would like it. Call us for details. We have a stain matching system. If you can send us a piece of something you would like to match we can do just that. We can also match Minwax stain samples if you would like for us to use. We can also match any paint color that you may want to use.
Shipping on Fireplace Mantel Orders is Absolutely Free
- Shipping is free on your mantel orders if you are in the continental United States.
- Orders placed in certain parts of New York (Zip Codes: 100-104 and 110-119) may be subject to an extra residential delivery fee. There is also an additional shipping charge to some Manhattan addresses.
- There is also an extra fee to shipments on the island of Nantucket, MA. Call us if you live in any of these areas for a quote on delivery.
- If you are located in Canada shipping is usually between one hundred and two hundred dollars per mantel, depending on the weight of your order.
Forms of Payment the Mantel Shoppe Accepts
We recommend using PayPal, Visa, Mastercard, American Express, or Discover. After you place an order, a representative will contact you with the required tools for measurement if needed. Once the measurements are assessed we will send you the dimensions of the mantel or other products. After your approval of the dimensions you can choose to pay with PayPal, call us with a Visa or Mastercard payment, or arrange another form of payment. Many homebuilders prefer to mail a check which is no problem. If you wish to mail a check we will proceed with the order and wait for reception of your check. Once the check is received the mantel, mantels, or other products will ship the next day or possibly the same day. Call us if you have any questions about the payment process as we are very flexible.
Mantel Installation
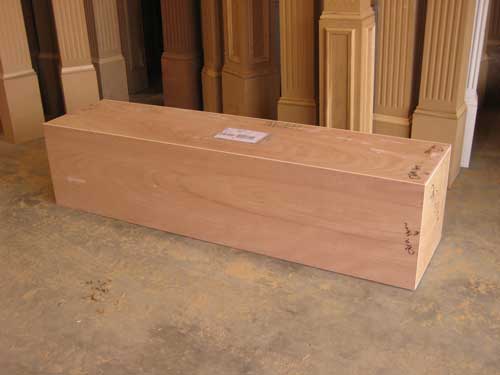
Each Mantel Shoppe Mantel is fully crated in plywood on all four sides to ensure it arrives safely.
Uncrating Your Mantel
Mantel Installation
After receiving your crated mantel follow these steps to install your mantel.
- Flip the crate on its side so that the bottom of the crate is exposed. All screws that secure the mantel to the crate are located here. All screws you see throughout the uncrating and installation process will need to be removed. A Square #2 drill bit will be ideal for the removal.
- After the removal of all the screws from the underside of the crate, you will need to remove the top of the crate. All of our crates are secured with staples on all six sides so this will require a little effort to remove the top of the crate. A crow bar or similar shaped object such as the back of a claw hammer are ideal to pry into the creases in the top layer of plywood. Once you have the top popped off the easy part of the installation begins.
- We have over 100 possible mantel configurations so each mantel is packaged a little different to maximize shipping efficiency. Most of the time the first thing you will see when you open the crate is the breast (the large upper part) of the mantel and two legs. Shelf style mantels without legs will be fully assembled and ready to install after removal from the crate.
- For full mantels with legs, cut the strapping that secures the legs to the breast of the mantel and carefully remove the three pieces from the crate. Be careful not to scrape the mantel parts against each other after they have been unstrapped.
- Remove the scribe molding from the back of the breast and sometimes the back of the legs. Once again, every screw you see needs to be removed from the mantel before installation. Do not attempt to install the mantel with any of the crating pieces attached to the mantel. Remove all screws.
- After you have removed all screws, place the breast portion of the mantel upside down on its shelf. Make sure you have a smooth, clean surface to do this and do not slide the mantel while on its shelf because debris may scratch the surface.
- Take the legs of the mantel and insert the appropriately assigned legs to each side of the mantel while it is upside down. The legs will fit so securely you may need to lightly tap on the feet of the mantel downward to the ground to firmly secure the legs to the breast.
- Once the mantel legs are secured to the breast, look for the predrilled screw holes in the back of the mantel where the legs and breast meet and where the returns and breast meet. Take the small silver screws that shipped with the mantel and use them to secure the portions of the mantel together.
- Once the mantel is assembled check out our videos below for different types of installation.
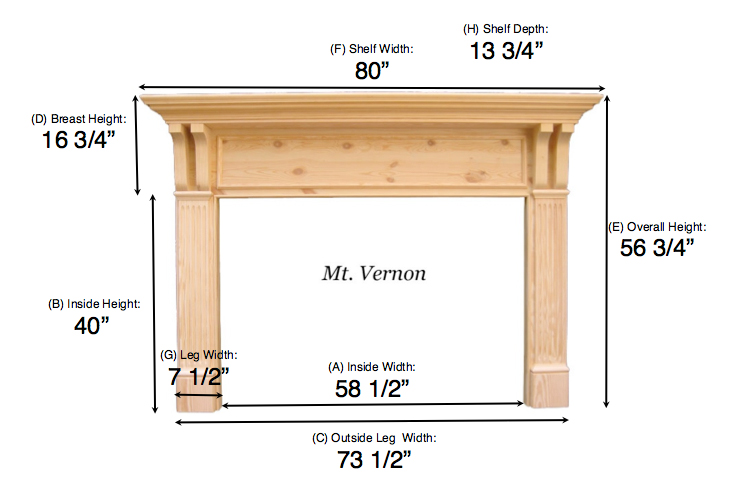
Fireplace Mantel Dimensions
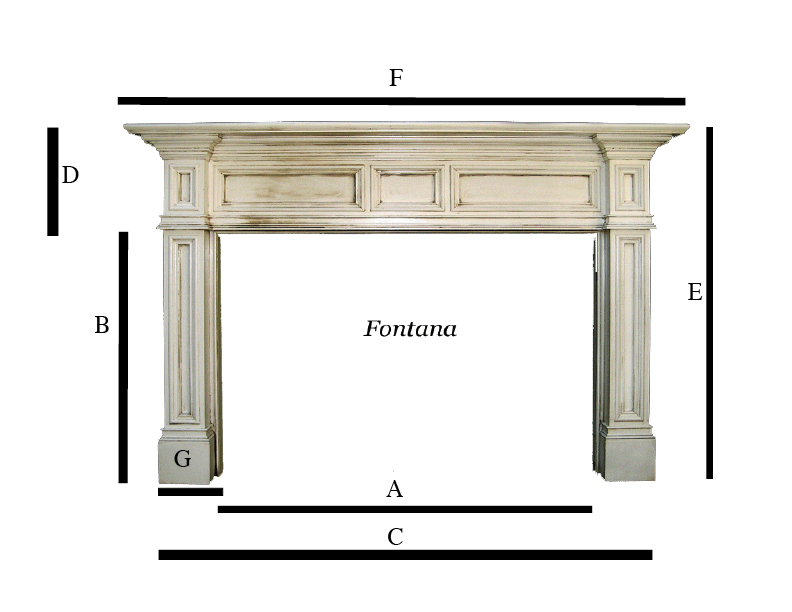
The dimensions for each mantel vary. Every mantel we build is custom built to fit your fireplace. Therefore, there aren't many set dimensions except for dimensions like: shelf depth, breast height, leg width, leg depth, etc. If you can email a picture with measurements of your fireplace, we can draw up exact dimensions of the mantels we can build for you and what we recommend. If you see something you would like to change we can change it for you. Use the Fontana mantel below as a guide for all mantel dimensions.
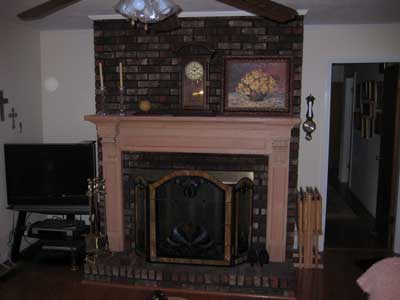
How to Install a Mantel onto a Brick Fireplace Profile:
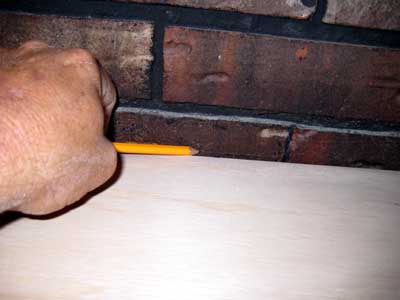
1.Set full mantel up onto brick hearth and flush back against the brick that runs up the wall. Make sure the mantel is somewhat centered with the fireplace opening (where the wood goes). 2.Make a pencil or chalk mark along the top of the shelf. Once your mark is visible and completely across the top of the shelf take the mantel down off the hearth, away from the fireplace and position the mantel so the pieces on the back of the mantel can be removed. The best way to do this is to lay the mantel on it's face on the floor. Make sure you don't scratch the shelf nosing.
3.Remove the scribe moulding. The scribe pieces are the 3 pre-cut pieces on the back of the mantel. The pieces are attached with 16-gauge brads and a good claw hammer is the best way to remove them. A claw hammer works best because it rolls in such a way as to not damage the scribe moulding. Set the pieces aside.
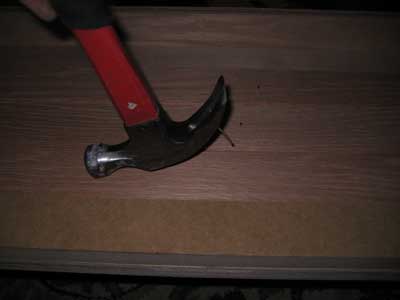
4. Remove the nailing strip from the mantel. It's okay to claw this piece away from the mantel because the back isn't going to be seen and the nailing strip isn't going to be seen so it can be slightly damaged.
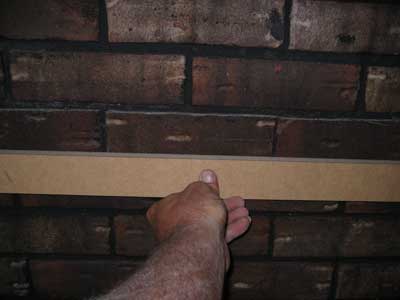
5. Take the nailing strip from the mantel and grab a pencil.
6. Fold the nailing strip over and place the top of the strip on the original mark. This new mark is 3/4" below the top of the mantel because the mantel shelf is 3/4" tall.
7. Roll the strip over so the top of the nailing strip is slightly below the second line. Now make a mark on the bottom of the nailing strip.
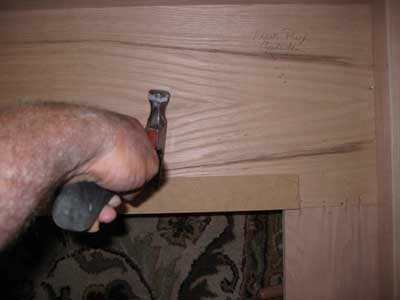
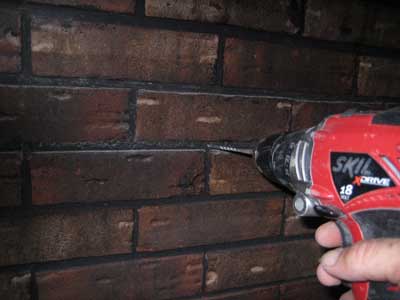
8. Drill 4-5 holes into the grout of the brick between the last two marks. Set the strip back up and follow your drilling through the nailing strip into the grout holes.
9. Drill the holes in the nailing strip to match up with the holes in the brick. You may want to drill the holes in the nailing strip and the grout at the same time. Just make sure you're drilling into grout and not brick.
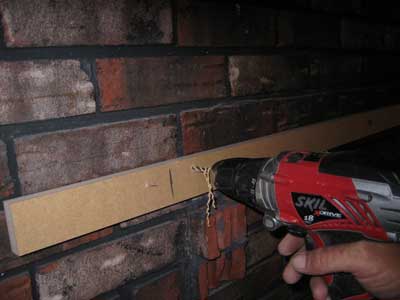
10. After your holes are drilled use blue concrete screws to fasten the strip to the wall. Use the same size as the drill bit used to create the holes and at least 2 inches long. Be careful not to tighten the screws too tight or they will strip out and loosen the grout.
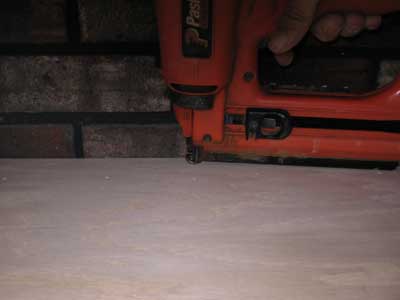
11. Slide the mantel back over the nailing strip and center around the firebox. Once centered, use 16-gauge nails or regular finishing nails to fasten the top of the shelf to the nailing strip.
12. Take the 3 pieces of scribe moulding you took off the back of the mantel and put all three in place back against the brick before nailing. Once you have all three pieces in place and everything fits and looks nice nail the scribe moulding to the mantel.
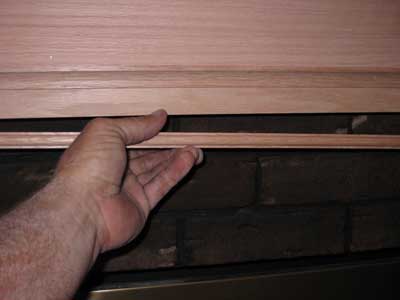
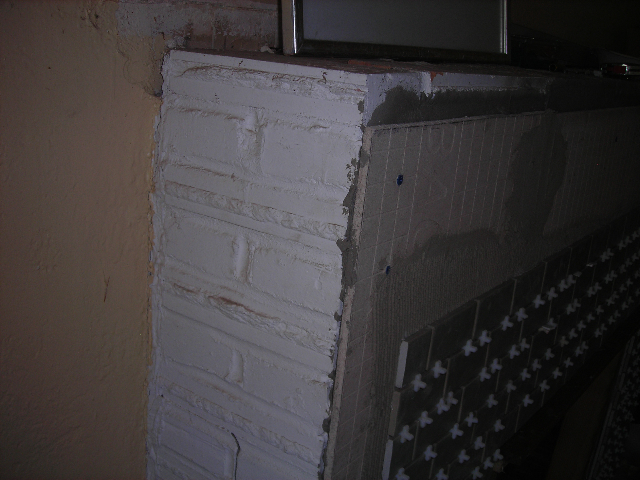
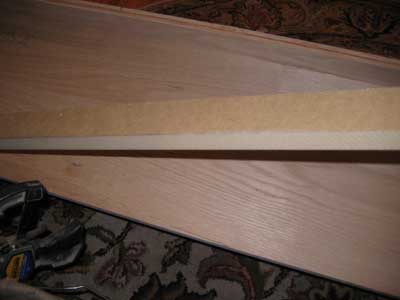
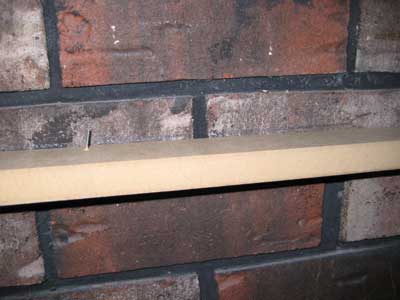
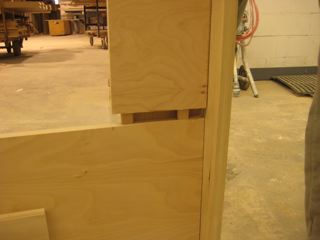
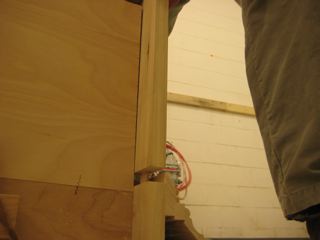
The gap between the mantel where the scribe moulding goes looks like this before the scribe goes on:
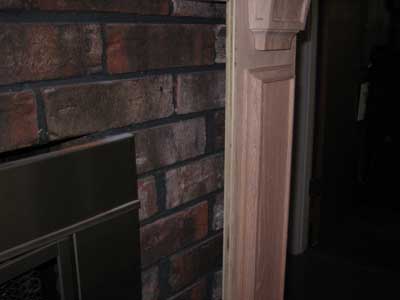
And afterwards it looks like this:
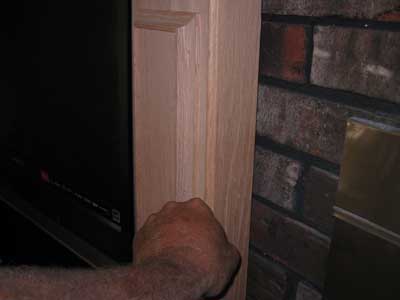
And finally it looks like this.
Cabinet Style Mantels
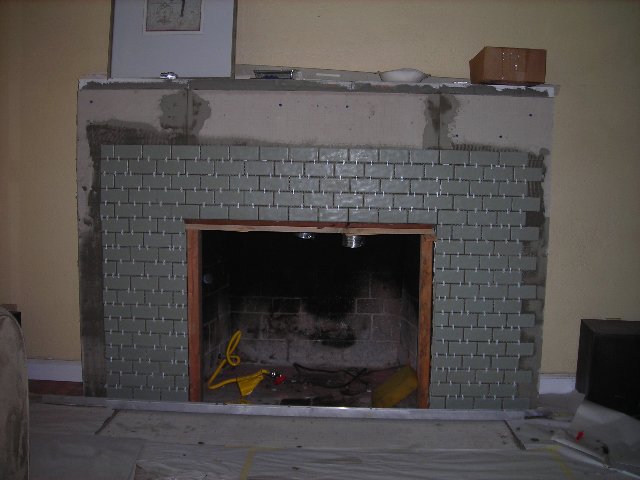
For situations where a mantel must wrap around an exteneded profile we use a "Cabinet Mantel." Here is a situation that would require a "Cabinet Mantel:"
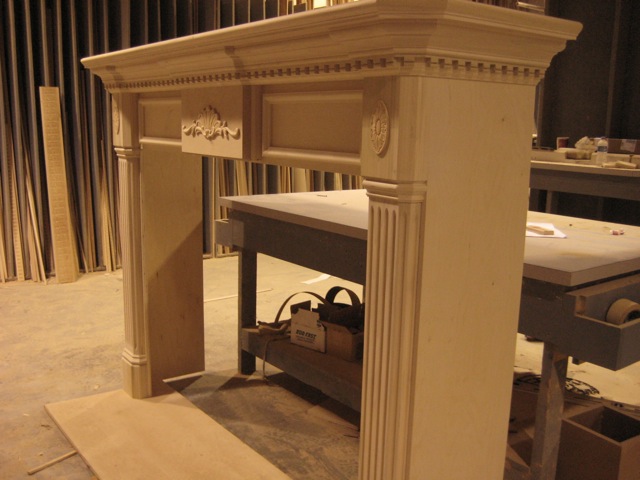
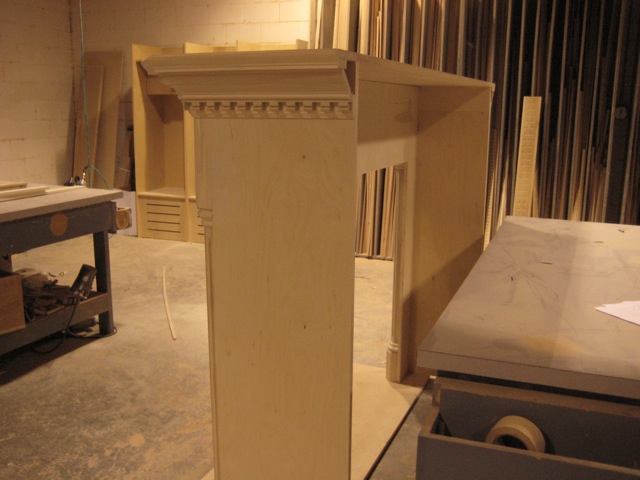
A "Cabinet Mantel" is a mantel with an exceptionally deep return such as this Sharpsburg Mantel:
"Cabinet Mantels" are the regular price listed plus $200 or possibly more depending on the exact depth of the mantel.
Call or email us for a quote.
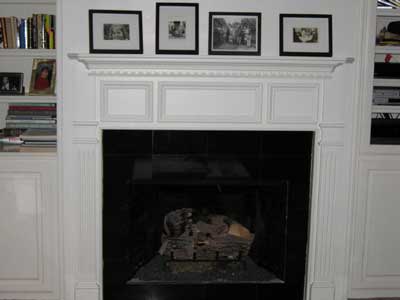
Designing a home can be difficult. While there are any number of choices you can make about your fixtures, you're looking for that perfect feel, and you'd rather not settle for less. When it comes to fireplaces, which traditionally serve as comfy gathering centers, homeowners prefer ultimate comfort. How high should your fireplace mantel be? The answer is not as obvious as you might think. Although the majority of mantels fall within the 48" to 64" range, you shouldn't let yourself be limited by tradition. Your mantel, like the other fixtures in your home, ought to be optimized for your comfort and yours alone. Mantels serve as resting places for casual knickknacks and and holiday stockings, but their origins are actually more functional. Because families used to spend long wintry hours huddled around the fireplace, mantels served as ready shelves for beverages, food, books and the day-to-day items families used most. Even during other seasons, mantels were used regularly because they provided easy access to open space for flowerpots and other decorative items. Your modern family may not be as tied to the fireplace, but you can get a lot of mileage out of your mantel anyway. Think about what you'd like to use it for and then plan the height accordingly. Some common usage suggestions include:
- Accessories for flat mount televisions.
- Photos, family urns and other decorative valuables.
- Incense, potpourri and other fragrant items.
- Self-serving stations for parties during warmer seasons.
Pick a convenient mantel height that matches all your planned usage needs. Now let's talk about safety. If you have small children, you might want to encourage them to keep them away from the dangerous fireplace. A high mantel that they really have no hope of reaching helps you define this as an adults-only kind of area. Also consider the fact that your furniture will affect your mantel's visibility. You might want to add some height if your fireplace room is already full of tall items and fixtures. When are shorter mantels appropriate? Again, remember that you can really choose anything you think fits in with your room, but it's nice when your mantel matches the fireplace below. If you have a wood stove or other low burner, a shorter mantle might just be the decorative element you need to tie the whole look together.
Scribe Molding 101
The scribe moulding which is installed after mounting the mantle is 1/2" wide and will reduce the opening width by 1" and the opening height by 1/2". The scribe is attached to the back of the mantel when shipped.
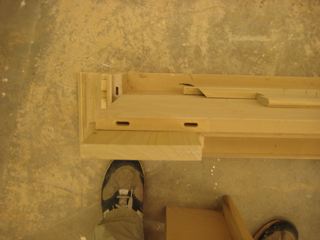
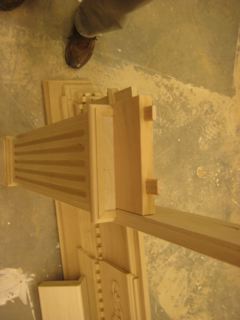
Fireplace Mantel Assembly
If you purchase your mantel via the internet it may require quick assembly before installation. You will notice there are holes in the breast of the mantel and "dominoes" in the legs that will insert into the breast. Here are pictures to give you an idea of what to expect.
Scribe Molding 102
In many cases, the facing material is a natural material, such as marble, or a rough material, such as brick, which may not be completely straight on the edge. It is recommended that the mantel overlap this material by at least 1/2" to prevent any gaps between the edge of the mantle opening and the facing material. This ensures you will have a straight, even finished edge.
Different Species of Wood for Creating Fireplace Mantels
We can build most of our mantels from any type of wood (Poplar, Oak, Maple, Cherry, Beech, Mahogany, Pine, Cypress, Alder, Birch, Walnut, Antique Heart Pine, etc.). There is an extra charge for stain grade materials. We use Poplar for our paint grade applications but Poplar also stains very well and is no extra charge for stain applications. In some of our bigger mantels we use plaster pieces for some of the decorative mantel parts. The species available are listed by each mantel in the "details" pages.
Framing up for a Double Mantel with TV Cabinet
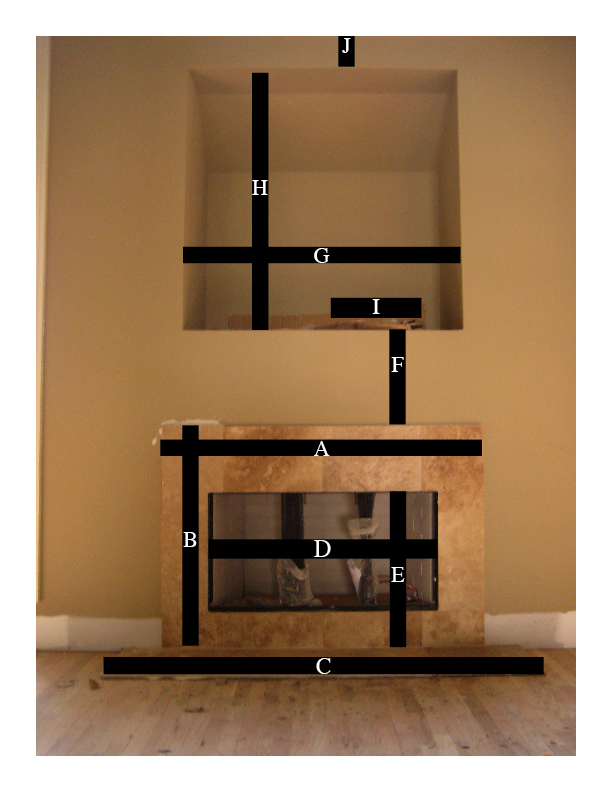
F: Ideal distance from top of profile to bottom of rough TV opening: 17 inches. This varies is your profile header is more than 12 inches.
G: Ideal width of rough opening: 48" for a 42" firebox. 42" for a 36" firebox.
H. Ideal height: 40 inches.
I. Ideal depth: As deep as possible, at least 24 inches to allow doors to slide back. For bi-fold doors depth is not that much of an issue. Just however far back you want your TV to sit.
J. As much as possible. Will usually depend on the height of the ceiling. The safe measurement is to the bottom of the crown moulding. If you have really tall ceilings, tell us how tall and we'll recommend an ideal height.
Fireplace Inserts
Depending on what part of the country you are in finding a fireplace will be different for each region. Here are the good ones that we know:-Colonial Fireplace in Pelham, Huntsville, and Robertsdale, AL.-R & R Fireplace in Irondale, AL (205) 951-3211.- Atnip Design In Huntsville, AL.
Mantel style: Mt. Vernon
Wood type: Hickory if possible
Profile type” Brick
Profile depth: 3.250 inches but varies from 3"
Wall width: 100 inches
Profile width: 59 3/8”
Profile Height 40 1/8” to 40 ¼”
Hearth width 59 3/8”-59 ½”
Firebox width 30 ¾”
Firebox Height 19 ½”
Notes
Wall width is measured from the window frame to window frame
D was measured from outside of glass trim to outside of glass trim
E was measured from the top of hearth to outside edge of glass trim
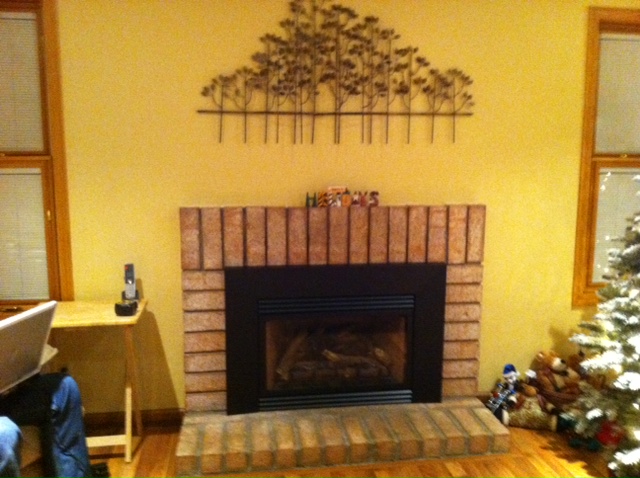
It will be very easy to take the legs to the floor and wrap around the hearth. The scribe molding that hides the gap between the brick and the inside of the mantel will sit on top of the hearth. It is 1/2" thick and it is taken into consideration in the drawing. So where the drawing has an inside width of 58 1/2" the mantel before the scribe molding is attached is actually 59 1/2" wide allowing it to slide down around the outside of the hearth. Your hearth measurement is 59 3/8-59 1/2 so it will work out perfectly.
Home Builders we Work With
We create mantels and columns for hundreds of great home builders.
There are too many to list but here are a few with web sites:
Nationally
Hendel Homes in Wayzata, Minnesota
Horan Building Company in Newport, Rhode Island
Bonacio Construction in Saratoga Springs, New York
Kovens Construction in Chapel Hill, North Carolina
Fanatic Finish in New York, New York
Sheffield Construction in Tallahassee, Florida
Team Sun Construction in Rancho Mirage, California
Waterford Home Builders in Hamilton, Virginia
Kovens Contruction in Chapel Hill, North Carolina
Cornerstone of Larchmont in Larchmont, New York
R.D. Rice Construction in New York, New York
J. Richard Watson Construction in Ocoee, Florida
Moonlite Electric & Construction in Cary, North Carolina
DiGiovanni Homes in Clearwater, Florida
Cruickshank Remodeling in Atlanta, Georgia
Pizzagalli Construction in Vermont, Maine, and North Carolina
E H Custom Homes in Lewes, Delaware
Tom Woodruff Signature Homes in Midland, Texas
Locally
Signature Homes in Birmingham and Huntsville, Alabama
Alabama Heritage Homes in Huntsville
HPH Properties in Birmingham and Huntsville
Eddleman Homes in Birmingham
Byrom Building Corp. in Birmingham
Gibson-Anderson in Birmingham
HomeSouth Custom Homes in Birmingham
David Acton Building Corp. in Chelsea, Hoover, Trussville and Birmingham, AL
Tower Development in Hoover and Calera, AL
DKM Homes in Birmingham
Jim Christopher Construction, LLC in Gadsden
Structures, Inc. in Birmingham
A few subdivisions we work in locally
Just as we have hundreds of builders, our products find their way to hundreds of different subdivisions. Here are a few with web sites: Shelby Farms in Alabaster, AL
Ross Bridge in Hoover, AL
The Preserve in Hoover, AL
Hillsboro in Helena, AL
Carrington Lakes in Trussville, AL
Chelsea Park in Chelsea, AL
Liberty Park in Birmingham, AL
Lake Cyrus in Hoover, AL
Ballantrae in Pelham
Highland Lakes in Hoover, AL
Trace Crossings in Hoover, AL
Riverwoods in Helena, AL
Limestone Springs in Oneonta, AL
Mt. Laurel in Shelby County, AL
If you are in North America we can build a fireplace mantel just for you.
- The Mantel Shoppe services all of the United States and most of Canada.
- Locally, The Mantel Shoppe, LLC is distinguished in Birmingham, Gadsden, and Huntsville, Alabama, but we also send many mantels to the Atlanta, Georgia metro area as well as the Nashville, Tn area. We ship out numerous mantels each month on our delivery trucks to areas that are close to Birmingham and Huntsville such as: Chattanooga, Montgomery, Mobile, Meridian, and Memphis. Recently we have had several inquiries and ultimately shipped a lot of mantels to Texas, (most notably the Dallas-Ft. Worth area) due to the rapid rate of new construction in that area. Another area growing rapidly is Charlotte, NC. We have sent several mantels to North Carolina in recent weeks including Raleigh and Durham (a place dubbed the woodworking capital of the United States). It seems we mainly work in the Southeast but we've shipped mantels to Seattle, Maine, Ft. Lauderdale, San Diego, and covered a lot of ground in between.
Fireplace Mantel Installation in the Birmingham, Alabama area
We will install and measure in the Birmingham metro area and usually in the Huntsville area. If you don't live in one of these areas we will gladly be able to assist you in measuring and installing via email, phone, or fax. Here's a link to help you get started with your measurements.
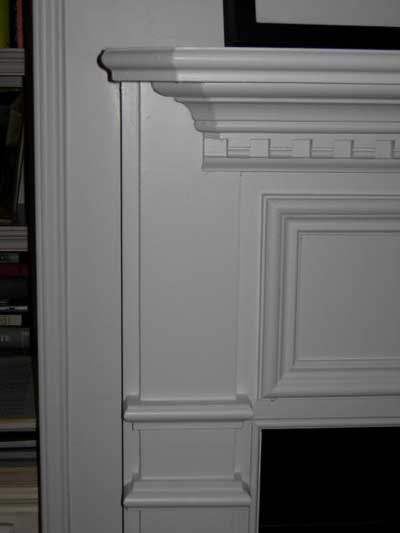
All trim in front fireplace mantels
On occasions where a small wall exist around the fireplace we must run the trim into the breast of the mantel due to the limited space. This option is only available on about half of our mantel styles. Here is an example of what we mean by "all trim in front."
The mantel is thoroughly protected during shipment by a 1/2 inch plywood container. There is virtually no chance of damage during shipment unless it is intentional.
We very rarely build any arched mantels unless the fireplace doesn't produce heat
We try to stay away from arched mantels because of the problems they create with getting everything else right around the fireplace. Most fireboxes have codes that require wood to be 10-12 inches away from the top of where the heat comes out. Most tile and marble applications are 12 inches standard on the top. If we make an arch, we have to start at the top of the profile 12 inches away and the top of the arch goes up to 16 inches or so leaving a rather large gap. The only way to compensate for this is by putting up a larger profile above the fireplace thus costing our customers more to get their fireplace ready for one of our mantels. Also, this raises the mantel height several inches. With flat panel televisions being so popular, above the fireplace is a prime spot for hanging the television. Most of our customers don't want the television to be too tall so this is another reason we stay away from arched mantels. The final reason is our scribe molding. Our scribe molding is a major part of our mantel design and it isn't thin enough to really bend around the inside of the mantel to create a perfect fit while maintaining the style of the mantel.